Pages

LIFE, LOVE AND A SPLASH OF SOME GLAMOUR
Showing posts with label DIY. Show all posts

Thursday, December 4, 2014

Jack's 1st Christmas Ornament


Now that we are in the full swing of the holidays. I've got the decorations up, most of the gifts bought and wrapped and I'm enjoying the precious moments with my little man. We have lots of fun stuff planned for the weekend; a light show, craft fair, another visit with Santa, and a German Christmas Festival.

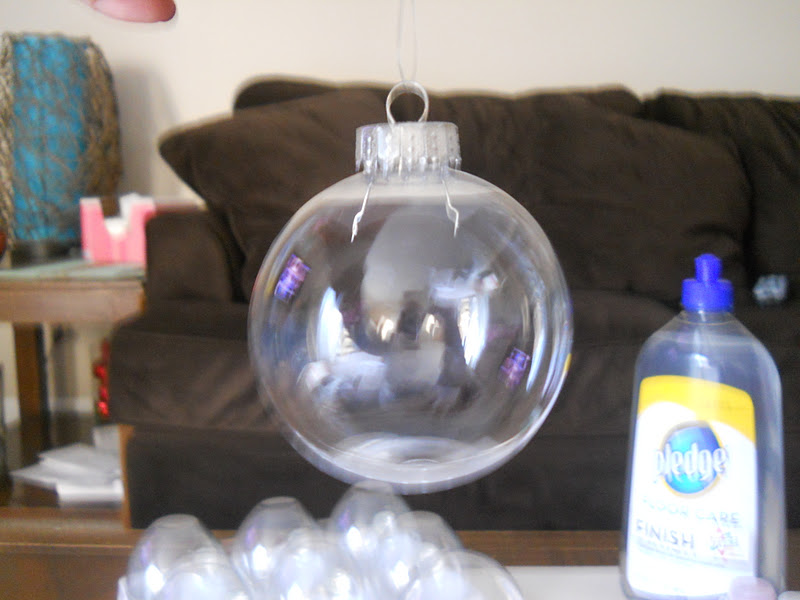
Before Jack was born I had seen the great ornament idea on Pinterest and knew I'd want to make it for our new baby.  Last year I bought a large ornament and when Jack came home from the hospital I added his hospital hat, and all 3 of our hospital bracelets. It was so easy yo make. 

How cute is that?

I get chocked up just looking at it.

Not long ago my precious baby wore that hat and tiny bracelet.


I love it!  It's simple but it is the most perfect thing on our tree. It just means so very much to me! 


If you like this one check out the  Wedding Invitation Ornament I did a few years back. 

Tuesday, October 28, 2014

DIY Felt Pumpkin

Fall is a favorite of mine. I also love the idea that almost all the decorations can go up in September and last through Thanksgiving when Christmas takes over. I haven't crafted much of anything since Jack was born and this took me a lot longer than it should have. Two weekends ago the weather  was pretty rainy, I was sick and Jack took a championship nap so i was lucky enough to finally finish it.


Here's what you need:

- Styrofoam ball
- 8 sheets of orange felt (8x11 sheets)
- 1 sheet of green felt
- Straight pins
- Scissors
- Knife


-First cut off the bottom of the styrofoam ball so it sits up on it's own
-Cut 2 leaf shapes out of the green felt and pin them on.  I chose to cut different shapes, one long and the other short and wider. Attach the leaves with the pins
- Cut out orange circles. I used a 3 inch ribbon roll as a template. I could get about 6-8 from each sheet of felt.
- Fold the circles twice and pin them on the pumpkin. I started in a circular motion around there styrofoam but found I was bunching the close together. I than started a line down the ball and realized the easiest was to do it in random order until the pumpkin was completely covered.
- Fluff the felt until no pins are showing and you're happy with how it looks.

So what do you think?

What are some easy fall crafts you enjoy?

Thursday, December 20, 2012

Christmas In Our Home

I can't believe this is the 3rd Christmas in our home. Each year we have added so many lovely memories and great decorations. Many of our decorations have been passed down from our parents. Each year we add a few pieces. I found my new favorites at Home Goods. Usually the day after Christmas I invade Pier 1 and Target for super sales!

Here are just a few of the decorations around our home.


Outside our home in the snow. Those little trees light up at night. 


A new cinnamon ornament and a sea shell ornament.

My DIY invitation ornament. Find the tutorial here. 

My Pier 1 owl, Yankee Candle tee light holder and my new print via Eighteen25

Home Goods star was a steal at $4

Personalized slate plaque from my sister in law. 
He's not a decoration but in my house you can always find him hanging under the tree. 

My little Bogart ornament

There are several Christmas Story ornaments on our tree. 


My wine bottles I kept from my bridal shower and the one from our engagement. I decorated them with snowflake ornaments. Its paired with another free printable. After I downloaded my computer froze. I have been searching Pinterest ever since for the direct link. If anyone knows the direct link please contact me so I can give them credit. 

View of our tree from our kitchen. 

Another one of my new favorites. This vintage santa sign is another steal from Home Goods, $7! 

What are some of your favorite ornaments and decorations in your home?


Friday, December 14, 2012

DIY Invitation Ornament

This last year numerous friends of ours celebrated momentous occasions in their lives. This year as part of their gifts I created a holiday ornament made of their invitations and announcements. I made several but I'd like to keep their ornament a surprise until we exchange next week. I'd like to share the ornament I made to celebrate our wedding.


As many of you know my husband and I were married in April. We had plenty of left over wedding invitations, direction cards, and RSVP cards. I kept my bouquet as well. This was super easy to create. I purchased a glass ornament from Michael's and started filling up the ornament some of my dried wedding flowers. I started to cut long stripes with all the cards I mentioned above. I rolled them around a pencil. When I had a good spiral and the bottom layer of the ornament was filled with flowers I added in spirals. I topped the ornament off with a gold bow and popped it on the tree!


Simple but so meaningful. I love ornaments with meaning. This one is perfect. I just hope my friends love the ones I made for them as much as I love this one.


Have a wonderful weekend!

Monday, November 19, 2012

Dare to DIY

A couple of weeks back I decided to take the Dare to DIY Challenge. The purpose of this challenge is to motive us to DIY projects through November and December. I loved the idea because I usually don't decorate for Thanksgiving and I'm usually so busy in December I don't take enough time for me to do the things I really enjoy. I'm very excited to participate.

This week our challenge was Dare to be THANKFUL.
At first I had a hard time with this one. I don't really know why. I think I just had a case of crafter's block. I painted a pumpkin we had picked in early fall. During Hurricane Sandy we brought our pumpkin inside and this is where it stayed. Ironically, a small pumpkin reminded me of how THANKFUL we are to have made it through the storm safely. "Give Thanks" just about says it all. I'm am so thankful our families and friends are safe, warm and able to celebrate with one another on Thursday.


My pumpkin sits on a cake plate my mother in law created for our spring wedding. These cake plates were used as part of our wedding centerpieces. Yet another thing I am thankful for. In addition to our painted pumpkin I purchased 4 small styrofoam pumpkins at Michael's this fall. I used my favorite Martha Stewart glitter and some spray glue to jazz it up.


For the next three Mondays I will be creating some goodies to share along with the hosts Two Twenty One, Maybe MatildaDecor and The Dog.

Up next week...


Monday, Nov. 26
Dare to… entertain!
DIY something for your table. This could be something from last wee’s Thanksgiving table or a new Christmas look. Get creative and use things in new ways. Or go true DIY and make something totally new. Ideas include place mats, table runners, place cards or centerpieces.


Thursday, May 24, 2012

DIY Wedding Baskets...

I absolutely love small, personal touches at weddings. I tried to throw in as many as I could on our special day. Our bathroom baskets were a simple little project my mom and I enjoyed doing together. 


Found this poem at Project Wedding

So happy you're here sharing our special day. 
But just in case something should go astray:

Please help yourself to the contents within
Mouthwash, hand lotion or ibuprofen

Use what you need, and just leave the rest. 
For it may be useful to some other guest.

Repair the damage that may have been done. 
Then quick Hurry back and join in the fun. 


We filled the baskets with:

Tylenol
Mints
Gum
Socks
Nail Glue
Wisps
Tissues
Shout wipes
Bush
Comb
Needle and thread
Chap stick
Nail polish remover
Lint roller
Socks 
Bobby pins
Deodorant

Most of the items were purchased at Harmon, $99 Store and on sale at CVS so it is a budget friendly project too. 

These were so awesome some one actually stole the basket out of the guy's bathroom. 

Tuesday, May 15, 2012

So I'm Actually Posting About My Wedding...

Like I have said before I haven't been very good about posting on our wedding although I thought I would have tons of stuff to chat about. I think there is just so much to blog about and I haven't had the chance to get all these things out. I really had the greatest day so I find it so strange I have had a bit of bloggers block about it lately. (I think I'm in a bloggers rut in general lately)

Last night we got an email from our photographer with a link to her blog with a sneak peak of our wedding photos!

Go check them out.

Linda and Peter


Photo courtesy of Linda and Peter Bernadic
Please ignore the double chin in some of them...So embarrassing.

Tuesday, March 20, 2012

DIY Bridesmaid Gifts...

To be honest I have never been a fan of the "typical" bridesmaid gifts. I have so many engraved jewelry boxes I can't even keep track of and jewelry I'll never wear again.  I'm not big on stuff especially things that take up space. So when trying to decide what to get my girls I knew I would have to search for some ideas. I was lucky enough to win embroidered tote bags but I had to be sure I filled them with goodies.

During the winter I was lucky to find $1 flip flops in Old Navy. Just because it was my lucky day they were all in greens and yellows! I ALWAYS change from heels to flats or flip flops at weddings. I hope these keep my girls toes happy.

All my girls love their wine, like me, well except for my 12 year old cousin! I got all the "of age" bridesmaids plain wine glasses and my cousin a mug. The BIG ones! I got them for $1. I purchased paint pens and let my inner crafty bide run wild.
I purchased an expensive Sharpie paint pen and I hated it.
 The cheapo Walmart paint was  so much easier to work with. 
My fave is the M glass.
Just so happens my bridesmaid told us she is expecting so that glass may not be used for a little while.  

The green dress is a similar design to the bridesmaid dresses.
You can't see but the bottom of the glass also has my Maid of Honor's name.
The mug has adorable flowers similar to the the J glass.


I figured I would include a nice bottle of wine. To go along with the wine theme I got them a cute wine coaster.

I also got my girls some other goodies. Tissues, nail files and another favorite of ours, Starbucks gift cards!


I'll show you the finished product when I get all the goodies in order.

What where your favorite DIY projects?

How about brides, what are some of your wedding DIY projects?

Tuesday, December 20, 2011

DIY Christmas Gift, Coasters

This year I'm making DIY drink coasters for our families. I found this great project on Pinterest

The materials were easy to purchase and extremely affordable. I picked paper that would coordinate with our families' living or family rooms. The music notes are for B's grandmother who is a piano teacher and provides lessons in her home. The beach theme is for my aunt's North Carolina beach house.


I cut the paper a bit smaller then the tile. 
I added Mod Podge to the tile, laid out the paper and added more Mod Podge. Be careful not to add to much. I did and it created creases on some.


Let sit for a few hours. 

Add some Tacky Glue and felt squares. 

The next day I added the clear gloss spray paint to seal. 


I added a sweat little message and a bow. 

Tiles: $.16 a piece
Scrapbook Paper- $.01-$.59 a sheet
Felt: 
Mod Podge: $6
Clear Spray Paint: $5
Tacky Glue: $1.0
Paint Brush: $.39


MERRY CHRISTMAS!

Saturday, December 17, 2011

DIY Christmas Gifts, Ornaments

This year my brother purchased a home. My mom told me he was in need of ornaments for his tree. Since this year is a DIY Christmas I knew I would want to make some ornaments. I found this fantastic post from  Green Bean Crafterole and wanted to recreate.

Another awesome Christmas gift idea. It looks complicated but it really wasn't. It looks messy but it really wasn't. Everything about it was surprisingly easy.


Remove all the ornament toppers. Be careful not to pinch your skin.


Pour a bit of wax into the ornament. You do not need a lot. A little goes a long way.

Swirl around and coat the inside. I swirled a bit to much and created bubbles. It was probably its better to take your time. Drain the rest back into the wax bottle. Use Q-tips to get the bubbles out if you have any.

I used a paper funnel and placed it into the ornament and poured in some glitter.
Put your finger over the opening and shake all the glitter around. 

Pour all extra glitter back into the glitter bottle.
Put the Toppers back in and look how cute they are!!!


I packaged them up from my brother (glad he isn't a blog reader) along with some holiday hand towels and a few holiday candles. 
I also made some for my family and Brain's. Hope they are a hit. 

Items:
Glass ornament, 6 Pack: $4.99
Glass ornaments, Large: $.99 each (Made these for my mom and dad)
Pledge Floor Wax: $5.88
Glitter: Purchased years ago and I can't remember. Any glitter will do.

Monday, December 5, 2011

DIY Holidays...Wine Corks

I'm a crazed wine cork collector. Probably because we are avid wine drinkers too! B and I big fans of Pinot Noir and in the summer I really enjoy Pinot Grigio. My favorites are Smoking Loon and Mark West. We also have a bunch of local wineries where we try a lot of different flavors. Recently we bought Blueberry wine. A little on the sweet side but delicious.

For the holidays I am making it a DIY holiday so I'm trying to make a bunch of adorable crafts. I hope our family will enjoy too. I should mention I come from a family of wine lovers. 


I display them in mason jars on my kitchen counter.


Purchased this small wooden serving tray at The Dollar Tree.

This part took FOREVER but I had to fit the corks just perfect. It took a few hours. 
I tried to get a bunch labels to show through. 
I took a picture for memory, removed them, painted it white.
After the paint dried I added them back to the tray with tacky glue and hot glue. 

Its super cute and can be used for display or its a perfect size to use as a hot plate or bulletin board.


Tuesday, November 29, 2011

Holiday Blog Challenge. DIY and X-mas Traditions


Linking up with Neely


Growing up my mom had one Christmas tradition. Every Christmas Eve we were allowed to open one gift! Every year that one gift would be a pair of new pajamas! She wanted to make sure we both looked nice for Christmas morning pictures. Now that my brother and I are grown and live in our own homes she still gets us and my fiancé new pj pants. (Total score last year when Old Navy had them for $5 on Black Friday) Usually my mom gets the most obnoxious and colorful pi's.

Christmas Eve 2009

He has a lot to drink that night. He was wearing my pjs. 

Last year my mom bought my xl bottoms and tshirt 2x. I guess she forgot I lost 50 pounds. Oh and I never wore a 2x. lol 
Brian's Polar Bears.


In our house we make something every year to add to our home or our tree.

I love handmade Christmas decorations. Growing up my mom encouraged us to make ornaments and decorations for the house. Most of her decorations are majority handmade by my brother and I. In keeping with tradition Brian and I try to make something handmade each year. He isn't into it to much but the things we do for love.

These are the ornaments we painted last year.

I bought these wooden ornaments in a craft store along with some paints and we have these cuties.
They are perfect bottom of our tree ornaments. Bogart loves hiding under the tree and knocks all the lower ornaments off the tree.  

Details:
Wooden ornaments- $.50 each
Paint- $.50 each (I bought 8)


DIY STOCKINGS-
I bought these plain red stocking at The Dollar Tree.


He added some snowflakes and that large green thing in the middle. What do you think it is?
He says thats a J???

His has a bow and a HO HO HO at the bottom! 

The stockings were hung!

Details:
Stockings: $1 each
Glue: Had at the house
Glitter: Had at the house